

TOOLKITS
Clay
Clay
“i am what i am"
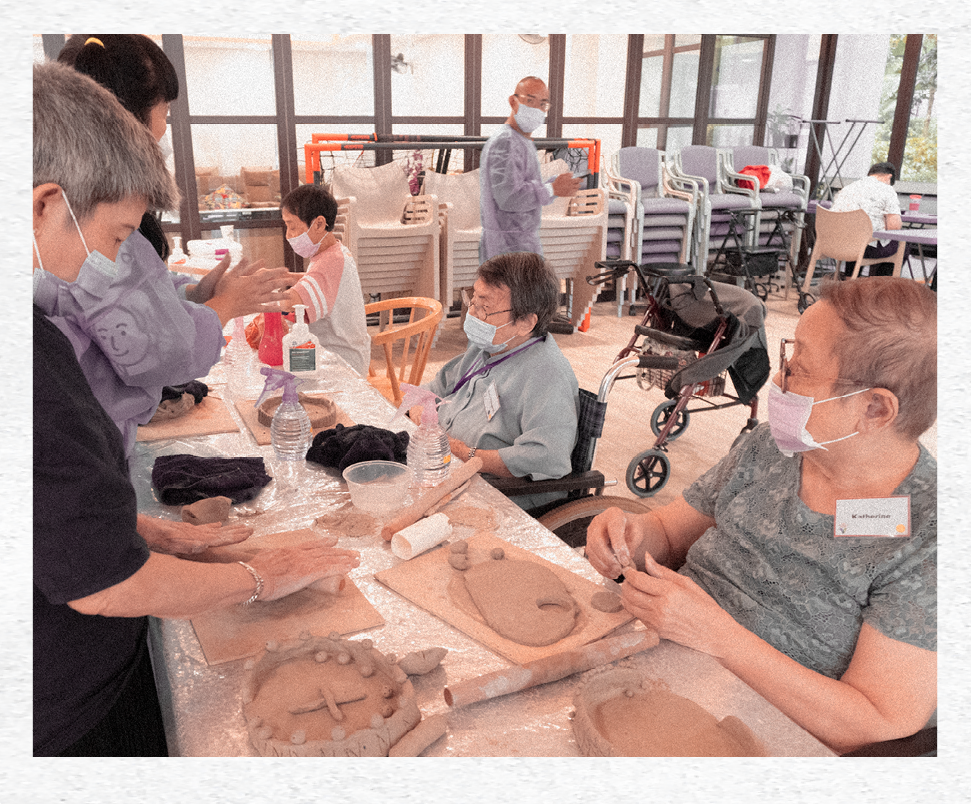
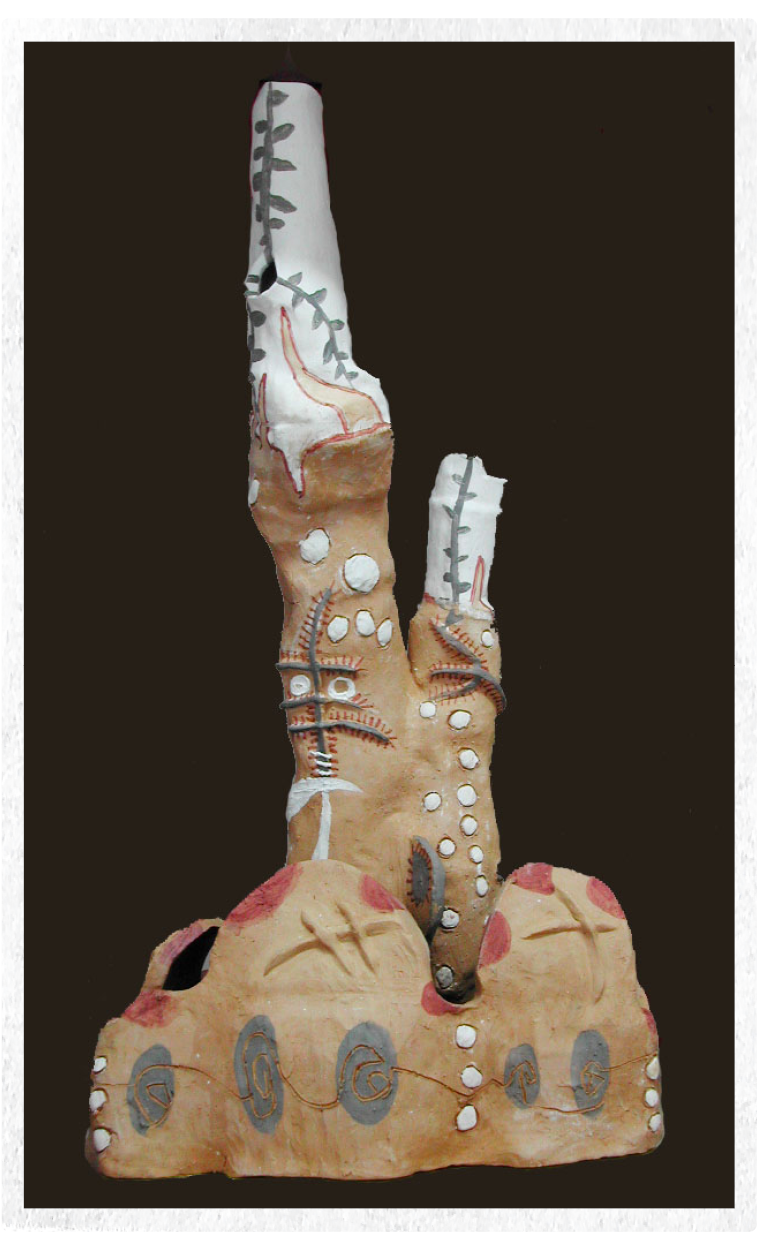
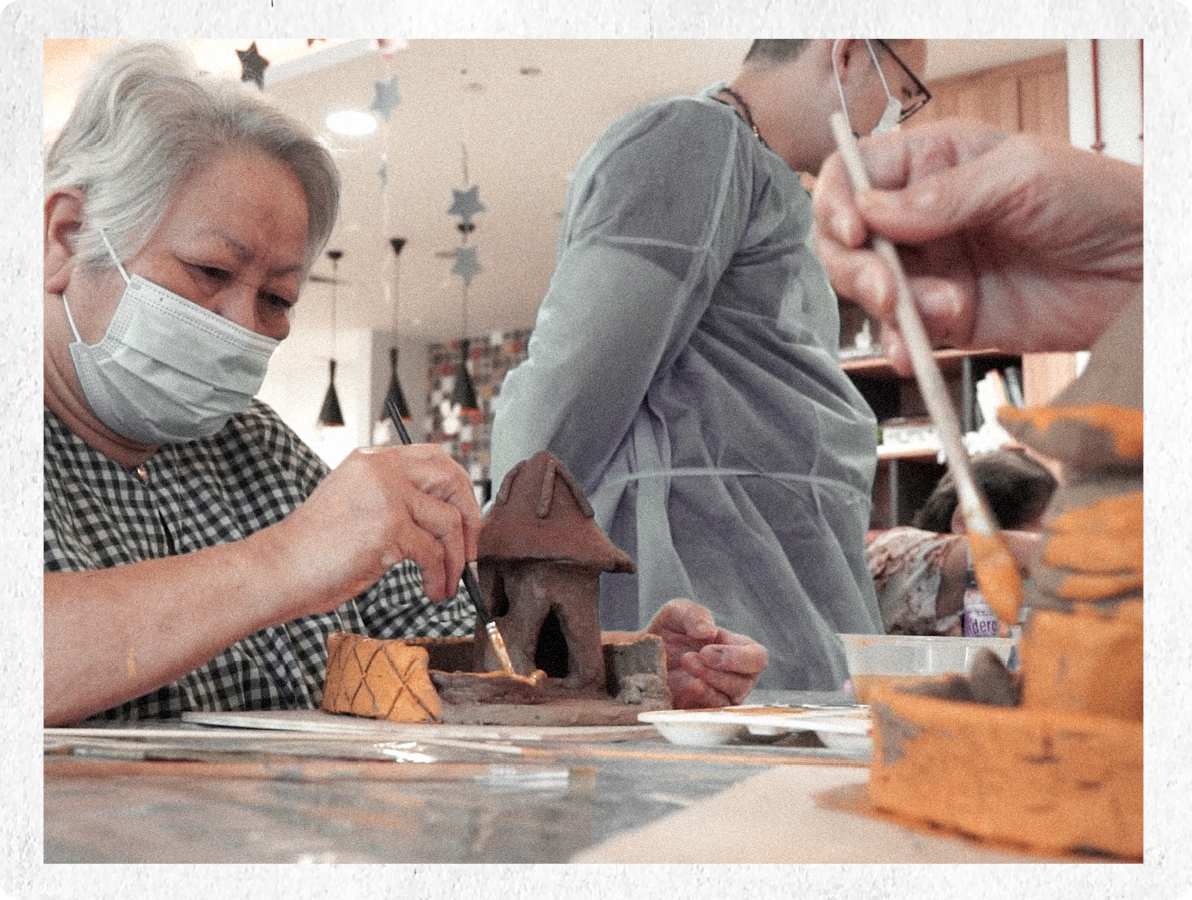
Through “wall-inspired building exercises” with clay, I invite the seniors to create architectural sculptures that can become a personal sounding place for solace. The ritualistic aspect of building and elevation, together with the symbolism of the growing plant, enables this living sculpture to be a tribute and celebration of life, time, and existence.
WHAT TO PREPARE
- 2 types of clay, preferably white stoneware clay & white raku clay for easy moulding
-
Tools for modelling clay (hands, sculpting tools, wooden boards, water, towel etc.)
-
Conversational tools with seniors
-
4 different types of glazes
-
Kiln for firing clay
-
Gardening Tools
LESSON 1
- Conversation with seniors: Imagine a space where they would like to live, their dream home, maybe a place they envision as a paradise
- Show a few examples of such works (artist’s artworks)
- Introduce the base: Every home starts with a base, a foundation. Make a slab of clay, then cut the piece of “land” where they will be building their structures. Roll the clay slab with a rolling pin until they get a smooth, firm clay slab & cut the shape of land they desire.
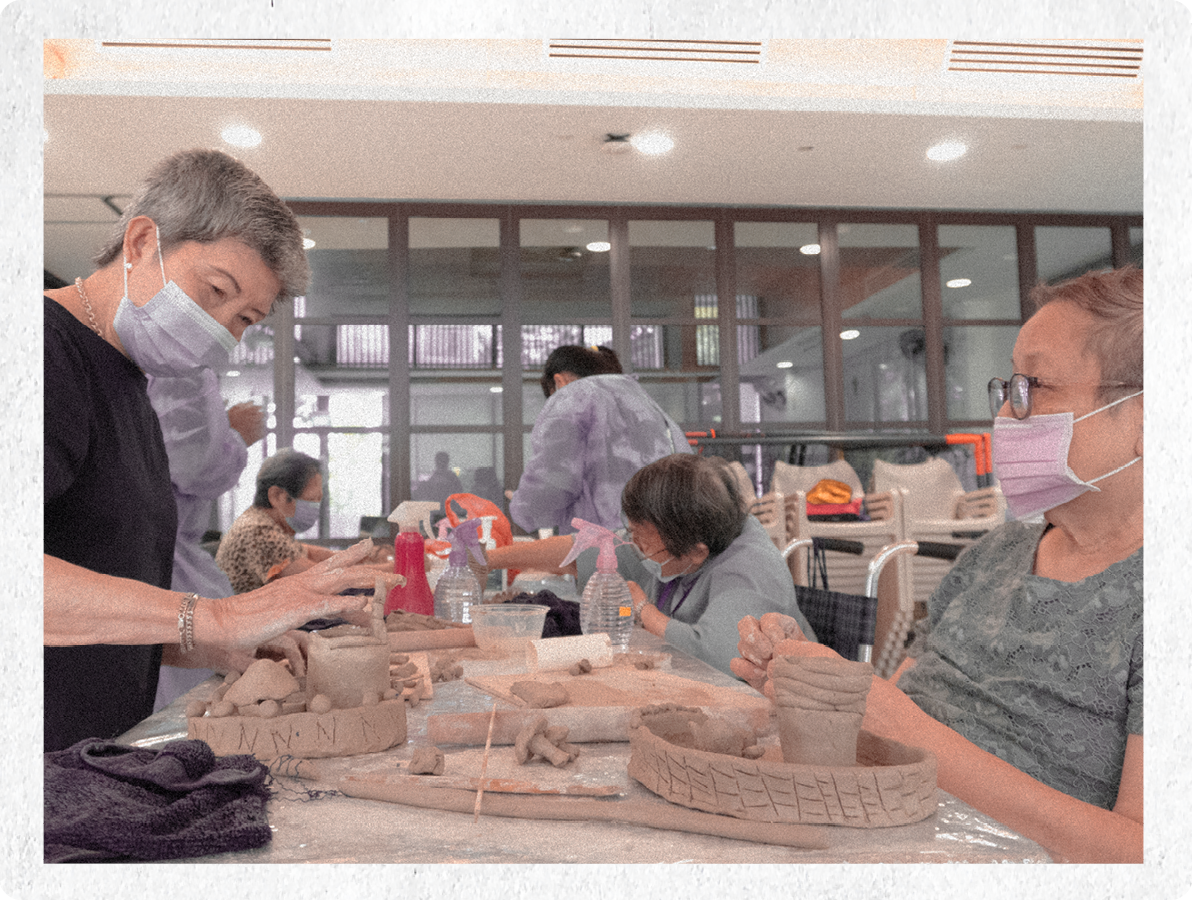
LESSON 2
- Conversation with seniors: Are they alone in this space? Or surrounded with people & things they like?
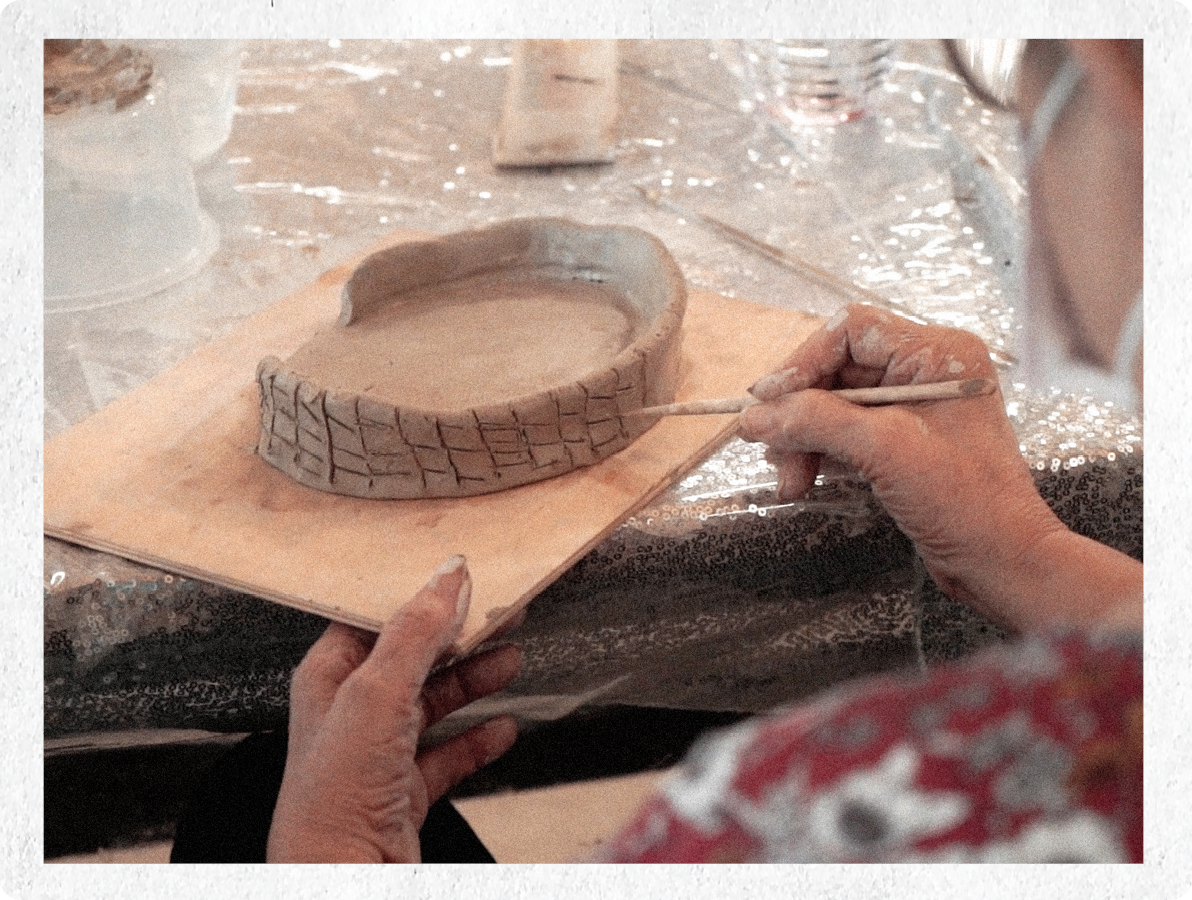
- Introduce building techniques: They can pinch the clay & coil it into ‘snakes’ to create walls for their structures. Feel the clay in their hands, get used to the textures & elasticity. Everything happens in their own hands. They can create repeated parts to create a more extensive structure. The repetitive modelling will be meditative.
- Introduce glue-making: They will learn to make a glue paste out of clay & water to stick their form onto the base, and to stick different parts of their structures together.
![#eye range:0.1 #eye rollspeed:0.5]()
LESSON 3
- Conversation with seniors: Are they afraid of heights or envision themselves living in a skyscraper-inspired structure? How do they want their design to be, with a rooftop attic, a terrace house, a house with a balcony? A building with lots of doors? A ground-level place with lots of windows? A light-house inspired formation?
- Introduce sculpting tools: They can add in details onto their building structure, such as cutting some shapes to create windows, making a rectangular slab for its door, additional slab to make a balcony etc. Lastly, they can complete the form by creating a roof or leaving an open space where they can see the night sky & the morning clouds.
LESSON 4
- Conversation with seniors: What kind of environment do they want to create? What are the sounds found in their environment? Is it noisy or peaceful? Where are they located? Near the sea? Close to nature or in the city? Or somewhere nostalgic like their childhood kampong?
- Introduce paint: They will be given four colours (oxides & underglaze with a transparent glaze). They can choose to paint their artwork selectively, as retaining some areas in natural clay colours can enhance the painted colours. In a way, this will let them know how they first started.
LESSON 5
- Conversation with seniors: Where are their places located? What kind of environment are they in? What is the sound that can be heard? Ask them to create the sound.
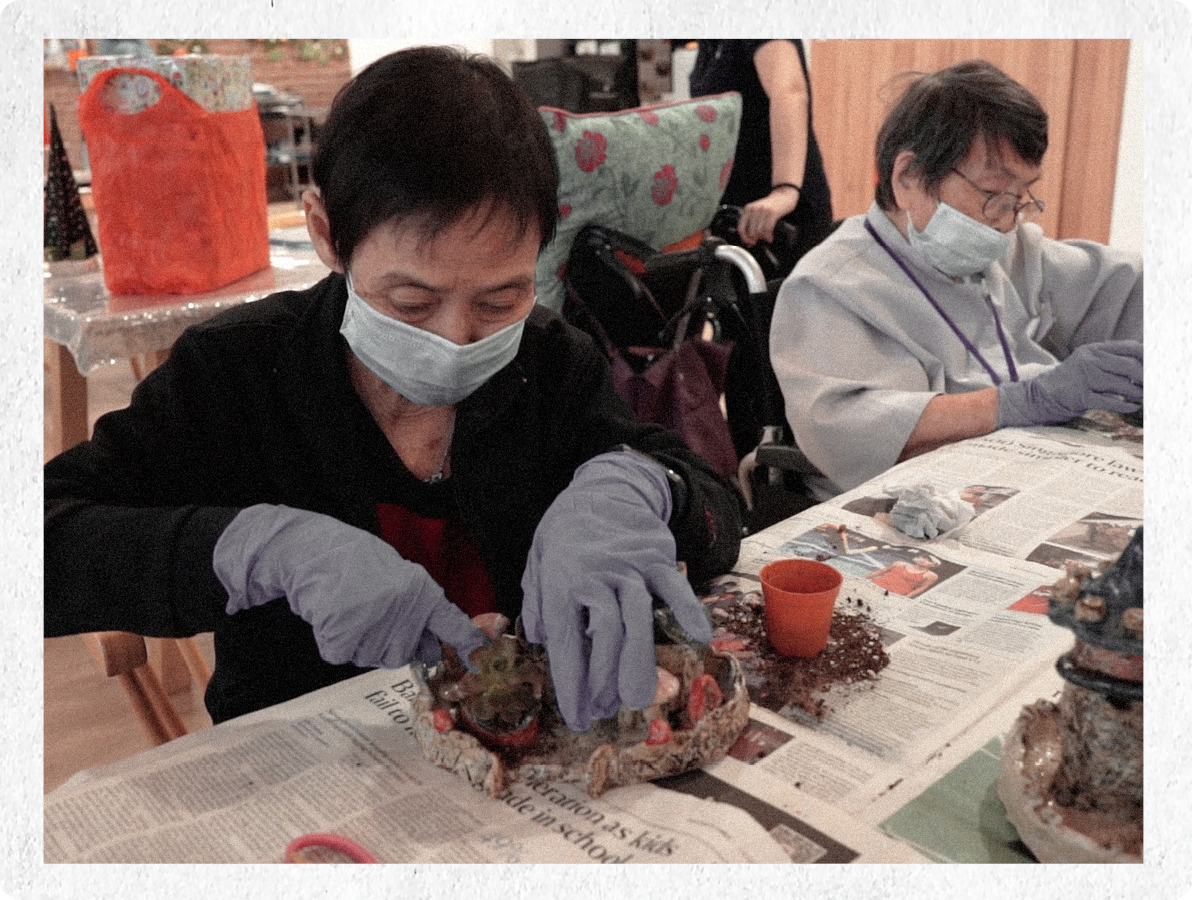
- Introduce gardening: After the clay works have been fired & finalised, it is time to pot & add some succulents or easy-maintenance plants. This planting session is like an opening ceremony for their place. With the gardening tools, the number of plants they can add in depends on the size of their ‘land’. Finally, they will name their place.
︎ Explore Toolkits
1. Handbook 2. Tiles 3. Washboard 4. Clay

